Birthday = cake.
DUH!
And since I want to practice on things that are for actual events (and not just for me to stuff my face with), I knew I'd have to make her a cake.
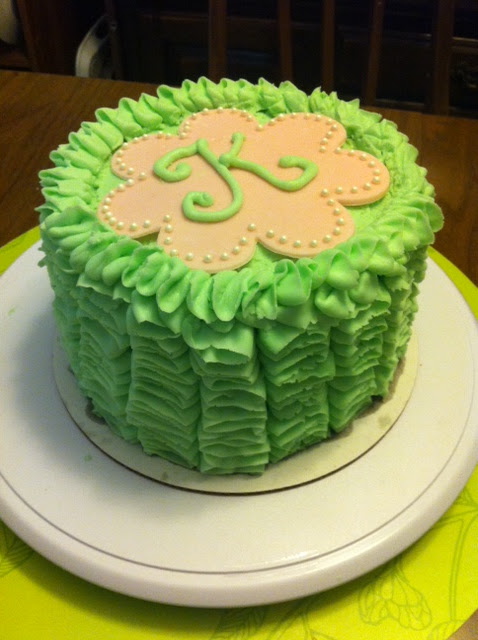
I wanted a mini cake for sure - six inch round - two layer. I also wanted to do something frilly and girly for her, since she's a girly girl. So I settled on a vertical ruffle design with a pink velvet cake.
Is it me, or does pink velvet just sound absolutely fabulous? Pink velvet. It sounds so girly and chic and awesome.
The secret to pink velvet kids, is that it's pink gel food coloring added to yellow cake mix. Which is neither chic, nor girly, nor awesome, really. But you don't have to give away the secret to your cake consumers.
Here's the batter:
My first try was a fail. I make a few errors - I don't think I greased my new pans well enough, for one thing. And then I put both pans on one dark 9 x 13 pan, because I thought it would be easier to get them out of the oven. This was a bad move. Didn't allow for even cooking, dark pan got too hot, etc etc.
FAIL! (A pretty fail, though . . .)
Shed a few tears and started over. This time, I decided to dense up the cake using white chocolate pudding. It added a lovely touch. I also added white chocolate mocha creamer instead of milk to thin my buttercream. Yum!
Second set was perfect. I decided to do a minty green colored frosting and a pink fondant monogram medallion on top.
So - here is the iced cake with all of it's romantic ruffles.
Next I worked on the medallion. I cut out a large flower shape with a flower cookie cutter. The fondant is Wilton petal pink. Another tip I've learned is that just because you don't get a "tool" from the cake decorating section, does not mean that it can't work wonderfully. Case in point, I poked the holes that would hold my edible pearls with a tool I got from a pumpkin carving kit. I've also used items from my son's playdough set to work with fondant (fully cleaned of course). I dabbed a bit of water into each hole with a paintbrush and then set each pearl in by hand. It still looks a bit wet in the photo.
And then I piped a large green "K" - her initial - on the dried flower (I let it dry for about 3 hours).
Here is my finished product. She absolutely LOVED it! In fact, she screamed! :)
She didn't cut it until that night and took a pic with her phone, so it's a bit dark. But here is the cut cake.


No comments:
Post a Comment