I loved this color combo.
Cake is 2 layer white almond sour cream with buttercream filling, buttercream frosting and fondant and gumpaste decorations.
Showing posts with label princess. Show all posts
Tuesday, January 31, 2012
Wednesday, October 19, 2011
The Princess Cake
My most challenging cake yet was the princess cake I made this weekend. It was for my second cousin who was having her 3rd birthday.
The cake was a two tier creation, all in purple, pink and white. Since my cousin wanted fondant and gumpaste elements, I had to being working a week in advance. Actually, I began on Monday night and that gave me plenty of time to complete things. On Monday night, I created the gumpaste bow, which turned out pretty well. I used a mixture of white gumpaste (I bought the mix) and very hot pink Satin Ice fondant. The blend made it a nice color -a bubblegum pink.
The next night I constructed the crown. I read on a website to make two, just in case one breaks, so I made two. Luckily, the first one never broke. This photo was taken after the crowns were dry enough to remove their "stablizers" which turned out to be a vase for one and a can of bread crumbs covered in wax paper for the other. I greased both of these well with shortening before wrapping the crowns around to dry. That way they slipped off easily. The bow is also here as well. I stuffed it with tissue to help it keep it's shape while drying.
I made other elements out of gumpaste and fondant - including small crowns, fondant balls for a border, stars and a scepter for the topper. I painted all of it with a mixture of luster dust and vodka and let it dry for a few days.
I also made a nameplate for the front of the bottom tier. This was a slight challenge because since it was going on a curved cake, I'd have to dry it on a curve. I searched the house looking for something (other than the cake pans) that measured 9 inches around. Luckily, a tin of popcorn my son had worked perfectly. I covered it in wax paper and laid the nameplate on to dry. The name and decoration was done in edible marker.
The cake was just three 9-inch rounds for the bottom and two 6-inch rounds for the top. All was iced in a violet purple frosting. I put all decoration on each layer (minus the crown and scepter) and boxed them up. I would wait to assemble them until the party.
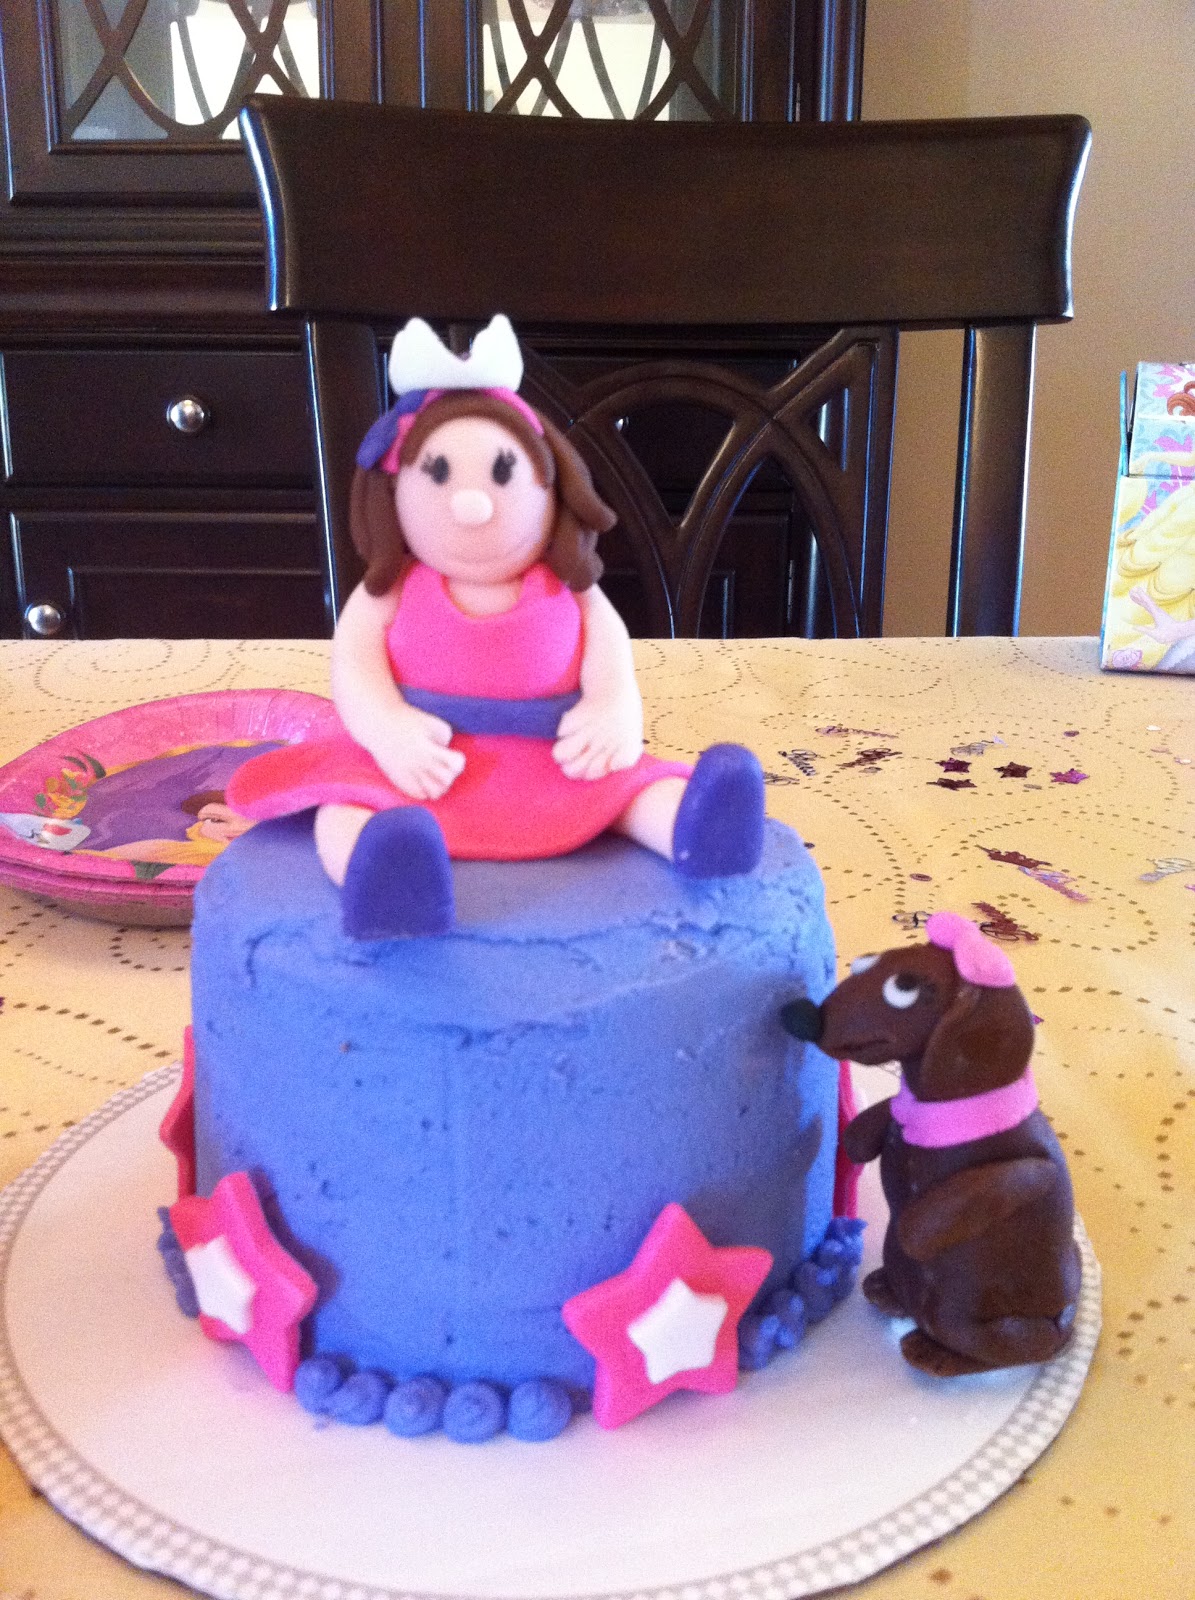
On a whim, I decided to make a figure of the birthday girl. This was my first attempt at figure making, but I'm quite pleased with the results. Unfortunately, as soon as I finished the figure, I realized there was no place for her on the cake anywhere -not the board, the top or the sides. So, I figured I would have to make a mini-cake for the birthday girl where I could put her little figure. After speaking with her grandmother, I learned that she's quite obsessed with their dachshund Missy, so I added a dachshund figure that would stand on the board and "beg" for cake.
Here is the result:
And finally, the Princess Cake. Assembly was quick. The crown went on perfectly, but - the bow was a bit big. This was my first bow attempt, so now I know that I don't need a bow with loops quite as wide for a cake like this. Oh well - it still turned out okay I think.
Other elements on this cake are edible pearls for the crown points that I found at Ross Dress for Less of all places! I love these pearls and have used them over and over. I have them in about 6 colors.
Overall, it turned out very well and my customers were pleased.
The cake was a two tier creation, all in purple, pink and white. Since my cousin wanted fondant and gumpaste elements, I had to being working a week in advance. Actually, I began on Monday night and that gave me plenty of time to complete things. On Monday night, I created the gumpaste bow, which turned out pretty well. I used a mixture of white gumpaste (I bought the mix) and very hot pink Satin Ice fondant. The blend made it a nice color -a bubblegum pink.
The next night I constructed the crown. I read on a website to make two, just in case one breaks, so I made two. Luckily, the first one never broke. This photo was taken after the crowns were dry enough to remove their "stablizers" which turned out to be a vase for one and a can of bread crumbs covered in wax paper for the other. I greased both of these well with shortening before wrapping the crowns around to dry. That way they slipped off easily. The bow is also here as well. I stuffed it with tissue to help it keep it's shape while drying.
I made other elements out of gumpaste and fondant - including small crowns, fondant balls for a border, stars and a scepter for the topper. I painted all of it with a mixture of luster dust and vodka and let it dry for a few days.
I also made a nameplate for the front of the bottom tier. This was a slight challenge because since it was going on a curved cake, I'd have to dry it on a curve. I searched the house looking for something (other than the cake pans) that measured 9 inches around. Luckily, a tin of popcorn my son had worked perfectly. I covered it in wax paper and laid the nameplate on to dry. The name and decoration was done in edible marker.
The cake was just three 9-inch rounds for the bottom and two 6-inch rounds for the top. All was iced in a violet purple frosting. I put all decoration on each layer (minus the crown and scepter) and boxed them up. I would wait to assemble them until the party.
On a whim, I decided to make a figure of the birthday girl. This was my first attempt at figure making, but I'm quite pleased with the results. Unfortunately, as soon as I finished the figure, I realized there was no place for her on the cake anywhere -not the board, the top or the sides. So, I figured I would have to make a mini-cake for the birthday girl where I could put her little figure. After speaking with her grandmother, I learned that she's quite obsessed with their dachshund Missy, so I added a dachshund figure that would stand on the board and "beg" for cake.
Here is the result:
And finally, the Princess Cake. Assembly was quick. The crown went on perfectly, but - the bow was a bit big. This was my first bow attempt, so now I know that I don't need a bow with loops quite as wide for a cake like this. Oh well - it still turned out okay I think.
Other elements on this cake are edible pearls for the crown points that I found at Ross Dress for Less of all places! I love these pearls and have used them over and over. I have them in about 6 colors.
Overall, it turned out very well and my customers were pleased.
Subscribe to:
Posts (Atom)